Hello and Happy Wednesday!
Here is a
HUGE
FREE
WALL ART
DIY
project I made yesterday.
Mine measures 5 feet across, but you could make yours any size to fit any wall.
This week the temperatures have been in the mid-60's, the flowers are blooming,
and the buds are bursting. You know what that means?
Yard work. Hard work.
Here in CNY (or at least at my house) Spring brings the disappointment wonderful surprise of everything the snow has been hiding all winter. In our case, it was sticks, sticks, and more sticks. And leaves, leaves and, yep, more leaves - all covered by the snow, before we had a chance to rake them, and now pressed together to the consistency of cement.
Sweet! (And by "sweet" I mean another "S" word. No, it's not "Surprise!")
Here's the thing. I HATE raking. My back hates raking. My kids hate raking. My hubby hates raking.
This year our yard was so bad, to save my sanity, I decided it was a mind over matter situation. To get through it, I told myself I LOVE raking. I love the exercise (my back is screaming), I love the fresh air (my nose is streaming), I love the wildlife (mangling worms and tearing them in half)... LOVE IT!
Anyway, with the help of the troops, I got through it, and we have the yard cleared up - ready for mulch and planting. I suppose it is somewhat satisfying.
And then I had a thought. I might as well get something out of this - satisfaction? Nah. Not good enough. I want something I can touch and see. Like wall art, of course.
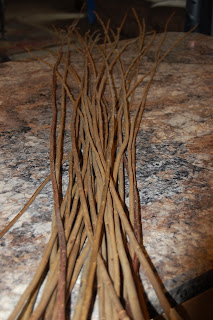
I gathered up the nicer looking sticks and kinda formed a plan in my head.
We have a large archway from our kitchen to the hall, which requires something large.
So, I made a 5 foot sunburst, using some of those sticks.
First, I cut out a 6" circle of card board, and covered it in burlap. I used this as a base for the sunburst. It is the center where I glued all of the sticks.
Next, I cut the sticks to two different lengths.
(I couldn't find my pruners, so I just used needle nose pliers with a cutter.
Where there's a will, there's a way.)
Being a highly technical person, I then used my eyeballing method to place the sticks.
For a little more detail on such method, and making sunbursts, go HERE!
I used my glue gun to glue all of the sticks symmetrically on the piece of cardboard.
I had this cool plate that used to belong to my grandparents, and I thought that would make the perfect center for my sunburst.
And here it is.


This is what it looks like through the arch from the kitchen to the hall wall where it resides. (It was difficult to get a good angle for taking this photo, but it does look large and impressive).
My teen-aged daughter saw the finished product and claimed that she loved it. However, as she walked by it she said, with a hint of suspicion and doubt, "I hope you used quality sticks".
Oh, yeah, they're quality sticks.
So, at the risk of sounding repetitive, I made this huge wall hanging for free. Some quality sticks were sacrificed, and a few worms lost their lives, but otherwise it was free.
So what do you think? Have you used anything from your yard to make a wall hanging?


10 comments:
That is a very creative wall piece. I think it looks great! I have not used anything from our yard to make a wall hanging but this is a great idea!
Thank you so much! Mine may prove to be too big as my hubby keeps hitting his shoulder on the branches!
I am amused by your daughters comment,lol, I have many kids I can picture one of mine saying the same,lol.
Love the plate you used for the center, looks great!
Hi Krystie, yes, the kids are hilarious!
What do I think? I think you are pretty clever to use all free materials to create this piece. I think you are very crafty to sneak your sticks by a teenager who wishes for "quality" sticks. I think you are truly entertaining. I have laughed and laughed about the murder of the worms while raking. Of course, don't they just grow new body parts? Came over from Junkin' Joe. So glad I did.
Glad you came by Donna. Yes, I'm pretty sure worm survival is strong. But man! You should have seen how many there were! My soil must be super good!
Great idea...fills the space nicely! Thank you for sharing at Rock N Share Wednesday! Hope to see you next week! Blessings, D@TheShadyPorch
That plate is really neat! Thank you for sharing this at Rustic Restorations Weekend!
Awesome project and fabulous results! Thanks so much for sharing with us! Hugs...
Thank you all for stopping by! :-)
Post a Comment