

Anyway, although I plan to embellish and use the plain sheers, there are a few windows that need the full window treatment. As per usual, I can't fathom spending a ton of money at the moment, so I will be making curtains. Well, sorta, I don't even own a sewing machine. And even if I did, probably the only thing that I'd end up sewing would be my fingers. And that just sounds painful.
SO, the secret weapon:
So head out to wherever you shop for fabric, such as Wally World, or JoAnne Fabrics, etc, and get yourself some fabric and some fabric tape! Or use what you have, like a tapestry, or a beautiful throw, etc...
You need: Scissors, Iron, Fabric Tape, Measuring Tape, Fabric, Curtain Rod, (and maybe) Curtain Hanging Clips
1. Measure
For one curtain panel, measure your windows and cut a piece of fabric that is the width of the window plus 4 inches and the length of your curtains plus about 10 inches. Remember to measure from where your curtain rod is fixed when measuring the length you need. Obviously, most people use two panels per window. You may want two, or maybe you like the look of just one.
2. "Sew" the sides
Check the instructions on your iron for the heat setting for the fabric you're using. Fold in the two sides of the curtains by one inch (towards the wrong side of the fabric) and press with your iron, and then fold in another inch on the other side, and press again. Make sure the seams are straight then, following the instructions on the fabric tape, use the tape to fix the seams in place.
3. Create the Top of the Curtain
If you're using just the curtain rod, the seam at the top needs to be an channel to thread the curtain rod or pole through. If the diameter of the curtain rod is one inch make about a three inch "channel". Do this by folding the top of the curtain under one inch and pressing using the fabric tape to fix this neat edge and then creating the three inch channel by folding in a further 3 inches on the wrong side of the curtain and fixing the fabric tape along the lowest edge of the seam. OR, make it even easier on yourself, and just omit making the channel, because you'll be hanging your panel with curtain clips.
4. Hang the Curtains
Hang the curtain on the rod, OR by the curtain clips, and mark the right level for the bottom of the curtains.
5. Finish Off the Curtains
Trim the bottom of the curtain if necessary. (I like the curtain to "pool" a little on the floor, so I leave it a couple of inches too long.) Create the bottom seam by folding in one inch to neaten the edge and fixing this with the iron on fabric tape then fold in the remaining excess fabric and iron with the tape.
Voila!
Even easier curtain: for my kitchen window, I'm hanging tea towels with curtain clips, for a no-sew window cover.
Like these, from West Coast Crafty:
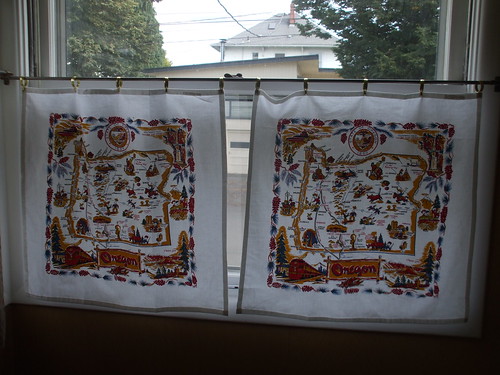
Or like this:

Both are sweet. Anyone else got some cool window treatments that don't involve me losing a fingernail???
No comments:
Post a Comment