Pages

Tuesday, February 25, 2014

15 TIPS to Decorate on a Budget

decorate on a budget, DIY tips, budget craft supplies


Decorating your home on a budget is easier than you may think. You don't have to be an interior designer, super handy or even artistic. You just have to have a little inspiration, a willingness to get a little messy - and perhaps a glass of wine hot cup or coffee.

Inspiration is the easy part!


  • Blogs
  • Pinterest
  • HGTV
  • Decor catalogs
  • Online Decor magazines
  • "Window Shopping"


Once you've got lots of awesome ideas, you're going to need supplies, and I have a few tips on finding them, and how to save money on all kinds of decor and craft supplies.

Here are 15 TIPS for buying craft and art decor supplies - CHEAP.

1. Home Depot and Lowe's paint stores sell the OOPS paint - cheap! Oops paint is paint that was mixed up to a certain color and either a customer didn't like it or never showed to pick it up. At Home Depot this week I got two really pretty colors of paint in sample size (about a cup of paint) for .50 cents each. You can get gallons for a couple of dollars. Stop by the paint sections and ask for the OOPS paint when you're shopping.

2. Again with Home Depot and Lowe's - If you're buying wood, big box stores will cut wood for free for you, or for a very nominal fee. JUST ASK. Check back by where they cut wood for customers for free. They usually have lots of scrap wood, which can be free. JUST ASK! 

3. The Dollar Store - I used to be a DSS (Dollar Store Snob). I wouldn't set foot in one, but now I might possibly be their #1 shopper. The dollar store is perfect to stock up on: glass vases, mugs, plain white plates, glass beads, "silk" flowers and greenery, contact paper, anything - just wander around!

4. Garden Centers (especially in Lowe's and Home Depot). Jute and twine and burlap. Huge rolls of burlap are available in garden centers - cheap! Same with jute and twine. There's no need to pay big money at fabric stores.

5. Fabric - for small-ish sizes, check fabric remnants. Fabric remnants are always marked down and usually large enough to use when making pillow covers, seat covers, and smaller projects. Also, don't forget to ask clerks when the 50% off the red tags are for great deals on the best fabrics.

6. Pallet wood is always hot. But it's not as easy as it sounds to pick up pallet wood. But if you know someone getting work done on their home, or an appliance delivered - these things are usually delivered on pallets, so ask to keep the pallets that most people throw away. Pallets = free wood.

7. Thrift stores - mason jars, cutting boars, lamps, picture frames, canvases (you can paint over)... these are the things I always look for.

8. Garage sales - Of course you love garage sales! Furniture, mirrors, frames ~ just be sure to look for good "bones".

9. Acrylic paint, spray paint, glitter etc... Michael's, AC Moore, Hobby Lobby. Check the websites for coupons - NEVER go without one! (Or get the app for the stores so that you always have the weekly discount code right on your phone.)

10. ALWAYS sign up for email alerts for your favorite stores. Even the dollar store has a mailing list. This way you will see the special mark downs and be able to add your coupon. When I'm in the market for canvases - I wait until they're on sale, and use a 40% coupon and pay very little!

11. To save indirectly (read; gas), I rarely make special trips to specific stores. Frequently I ride with my husband when he has an errand at one of the big box stores, and then check the paints and wood scraps while I'm there. If I'm at the grocery store, the dollar store and thrift store are on my way home. You get the idea.

12. Amazon. This is a post in itself. BUT, one trick I love is this: If you want something but it's not on sale, simply add it to your cart, but don't pay for it. Check your cart once in a while and if the item goes on sale, you will get an alert with the new price!


13. If you need fabric, do you have old sheets, curtains, blankets, shirts etc.? Maybe the pattern is perfect for what you need, and you don't need to buy fabric at all.

14. EVERYONE has junk they don't want. Just let your family and friends know what you're in the market for. I just scored a beautiful old mirror that my parents gave me. My mother in law gave us a head board, which I plan to re-finish in the Spring.

15. Rather than buy fiber filling, use old pillows (of your own) for the stuffing, or to re-cover. (I'm not suggesting you use other peoples pillows, NO! Dust mites and drool! I only tolerate my own dust mites and drool).

Tell me your tips on finding craft and DIY supplies! I would love to add them to the list!

HEY don't forget to subscribe to my newsletter! (Above) All the cool kids are! OK, well, my mom did... 

Also, if you would like to join in some fun link parties, click HERE


PIN: 
decorate on a budget, DIY tips, budget craft supplies

Saturday, February 22, 2014

Paint Swirl Vases

Clear glass is so fun and easy to paint. With this paint swirl method, you can use any colors you like, which makes it easy to match any decor. Plus with this method for painting glass, you don't even need a paint brush. 

DIY painted glass, paint swirl vases, painted glass

Last week I made faux milk glass HERE. This is essentially the same idea. To make this vase, you use the same technique, only you add another paint color (or two). Look what happens! I think it look so pretty!

Pick out two acrylic paint colors.

Pour in about 1/8 cup of your first color of paint in the bottom of your vase.

My first color was white, and I swirled this around until about half of the inside of the glass was white. Be sure to swirl slowly. If you go to fast, the paint will drip all over. There was still some clear showing when I tipped out any excess white paint.

You can tip it onto newspaper, or paper towel - whatever you don't mind throwing away. I tipped mine right into the sink, and washed the excess paint right down the drain. I have a stainless sink, but I don't know if you'd do this with ceramic...Then I added the second color.

I swirled the glass with the two colors and they mixed into one another. When I was happy with how it looked, I tipped the painted vase upside down and let the excess paint drain again.

After it had dripped for a while, I turned it right side up and wiped down the rim with a damp paper towel, to remove any excess paint.

DIY painted glass, paint swirl vases, painted glass

I then left the paint swirl vase to dry overnight. 

I'm using these as candle holders, but you could use your vases, depending on the shape, to hold dried flowers, or decorative sticks, or just on their own. (Don't put water in them though!) 

You can see in this picture below, how cool it looks even from the inside! 

DIY painted glass, paint swirl vases, painted glass

Since I keep buying vases at the dollar store - several more painted vases look likely in my future. Don't you think these would be perfect as gifts?

Keep in mind that you can't use this glass for eating or drinking. Nor is it dishwasher (or hand washing) safe. 

HEY don't forget to subscribe to my newsletter! (Above) All the cool kids are! OK, well, my mom did... 

Also, if you would like to join in some fun link parties, click HERE


Friday, February 21, 2014

Make Your Own Coffee Creamer


I drink my coffee with LOTS of powdered coffee creamer. Classy? Perhaps not, but once you try this coffee creamer recipe, or the flavored version, you'll be hooked too, SO c'mon over to the dark side!

coffee creamer recipe, make your own coffee creamer, powdered coffee creamer recipe

Powdered Coffee Creamer

Makes approximately 2 1/2 cups

2 cups instant nonfat dry milk
¼ cup powdered sugar
2 tablespoons coconut oil, melted

Combine dry milk and sugar in a bowl. Add coconut oil, drizzling it over the top while mixing with a fork. Mix well until there are no lumps. Put it in a jar with a lid and give it a good shake. Once you have it all mixed up, you can store it in the pantry.

For flavored coffee, add any of the following:

1 tsp vanilla extract
1 tsp almond extract
1 tsp orange extract
1/2 cup cocoa
1 tsp peppermint extract
1 tsp cinnamon
1/2 tsp nutmeg

You get the idea! Just add one of the above (or combine a couple) to the dry ingredients, put the lid on, and shake for a few minutes to mix thoroughly.

Wouldn't this make a great hostess gift, if put in a cute mason jar?

What would you flavor the creamer with?


Please remember to subscribe to my email for my Newsletter (with coupons)!

For a list of awesome link parties - CLICK HERE !! 

Wednesday, February 19, 2014

Blueberry Filled Cupcakes

blueberry cupcakes, blueberry filled cupcakes, cupcake recipes

Hello there everyone! 

Recently I was browsing ideas for a quick dessert for my kids, and came across a cupcake recipe that I wanted to share with you! You HAVE to see the pictures! DROOL!

It's called Fresh Blueberry Pie Cupcakes  from Sewlicious ~ and her pictures looked so good, I had to make them immediately. BUT. I didn't have the main ingredients. And it was snowing. 

I did what any good mother and wife would do. 

I sent a text to my husband who was at work: 

Honey. Please stop at the store. Get yellow cake mix, and a can blueberry pie filling. STAT!

blueberry cupcakes, blueberry filled cupcakes, cupcake recipes

Just like a baking superhero, I had dessert made less than an hour later. 

These cupcakes are so cute, and perfect for impressing your kids! They have a buttery graham cracker base, a light fluffy cake exterior, and a fruity blueberry middle ~ topped off with a creamy frosting. Heaven. 

(For the full recipe, please go visit Sewlicious HERE.)

I made two changes out of necessity ~ 

1. The recipe calls for the cupcakes to be topped with meringue. It looked so pretty, but I'm not fond of meringue, so it was necessary for me to use cream cheese frosting. Store bought. 

2. Dutifully, Big A did pick up a yellow cake mix, but it was lemon flavored. It was a happy mistake, because it tasted great with the blueberry filling. I haven't even tried this with plain yellow cake yet. 

So, my version was a cheap imitation of the original, but still. If you want an easy but fun dessert for your family or a get together, this is it! 

Try it! You'll like it! 

Don't forget to subscibe to my newsletter, and if you want to par-tay, click HERE!

Would you like a coupon for Starbucks Coffee (goes great with Cupcakes!) ~ Click below!

$2.00 off two Starbucks Packaged Coffee products

Monday, February 17, 2014

Burlap Wall Art Tutorial


I really liked the silhouette that I made for my sister HERE. So, I used the same moose head silhouette and traced it onto a piece of burlap. And then I used craft paint and filled in the outline. 

And there it sat. For about a month. On my kitchen counter. 

I periodically moved it from spot to spot. 

I just couldn't think of what to do with it... I have a lot of pallet wood and could make a frame. I could somehow glue it onto a lampshade. Maybe make a wood sign for outside. I could sew or fabric glue it onto a pillow... 

The indecision finally drove me to make a decision. 

I found an old painting from the thrift store for $1.50, it was on canvas but had a rip and was generally in poor condition. I bought it for the frame, but I realized I'm able to use the canvas for the frame. 

I decided to cover the canvas, in order to used the frame. So I ripped an old white pillowcase open to fit around the frame of the canvas. I wrapped it like you'd wrap a present, and used a staple-gun to staple it to the back of the canvas frame, so that the original "art" wouldn't show through. 


(I trimmed the extra fabric.)


Next I used some burlap and cut that into a large rectangle. You will see that I eventually used three different textures of burlap. 

To cut evenly, you pull one of the burlap threads (see below). 


When the thread is removed, it leaves a perfectly straight space, that you can follow to cut. 


Once that rectangle of burlap was cut I wrapped the canvas again, and stapled it on the back side too. I followed this with a line of hot glue all around the underside edge ~ just to make sure it stayed in place.

I then just layered two smaller rectangles of burlap, one of which had the moose head on it. 

burlap crafts, DIY wall art, using burlap in decor, burlap projects, DIY burlap project

I used a pop top to hang. To do this, just pull the top off of the can, and glue gun it centered on the back of the picture you're hanging. I use a large amount of glue - just in case!


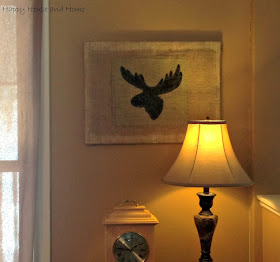
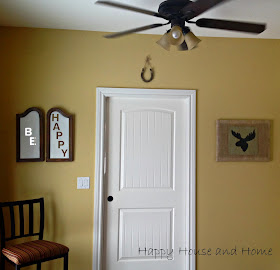
Now the moose is hanging in my dining room. I'm (surprisingly) indecisive as to whether it will stay there! :)

burlap craft, sillhouette craft, DIY wall art, wall art

Here he is in the dining room... 

burlap craft, sillhouette craft, DIY wall art, wall art

And here he is in the kitchen...

burlap craft, sillhouette craft, DIY wall art, wall art

What do you think?

Are you in the market for some burlap?

I just bought a 24' roll for under $10! (I have Amazon Prime, so the shipping is free too...) Just click the link below...

If you'd like to join me - I party HERE !

Friday, February 14, 2014

Add a Warm Glow with Candles and Twinkle Lights ANY Time of Year

Happy Valentine's Day and Happy Weekend! 

In keeping with the sentiment of the day, I thought I'd round up a couple of my DIY candle and twinkle light projects. Candles scream romance, and twinkle lights are the poster child for the holidays ~ but whether romance is on your mind or not, it's always nice to incorporate candles and twinkle lights in your home. I personally love the warm glow, all year round.

Both are warming yet happy at the same time.

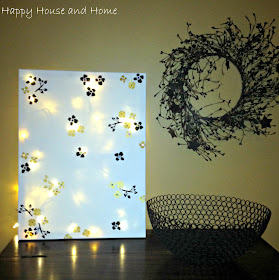
This first Twinkle Light Canvas used to be in my dining room, however it now lives in my daughter's room, where she uses it as a night light.

candles, twinkle lights

The next twinkle light canvas I make will have a black background.

I made the glass bead and twine candle holder from an old hurricane vase. The glass beads really twinkle and add a little color to the candle glow. 

candles, twinkle lights

Painting glass jars, and either decorating them, or stenciling the makes a pretty candle holder. I love that you can see the tea light though the "K". 

candles, twinkle lights

GLITTER. I am in love with glitter. A little bit goes a long way, so I spare my husband and sons too much sparkle - but seriously, look how pretty. If you add a little jute or burlap, it tones down the whole "girly" effect enough to use in your day-to-day decor. In my humble opinion!

candles, twinkle lights

I put twinkle lights out all year. I love them tucked into a corner of a room. This is actually a large glass oil lamp that I emptied out and filled with twinkle lights. At night I turn off the lights in the kitchen and leave this on. It lights up the whole kitchen but looks in a very glowing soft light.

candles, twinkle lights

Painting the inside of candle holders or jars also create a really pretty glow, just like this
Faux Milk Glass candle holder!

candles, twinkle lights

These glitter candle holders go anywhere, and create the perfect centerpiece when lined up down the center of our table, or in a window sill.

candles, twinkle lights


I got this large vase at the Corning Museum of Glass. After I bought it I realized it was awkward as a vase with that small opening and large bottom, but I still loved it. In this instance I filled it with pine cones mixed with twinkle lights. As the seasons change you can add whatever you like with the lights. When Spring arrives (please hurry!) I'll change out the pine cones and tuck in some silk flowers.

candles, twinkle lights

Do you use candles and twinkle lights year round? If so, where do you tuck them?

Tuesday, February 11, 2014

DIY Faux Milk Glass

faux milk glass, DIY milk glass, milk glass


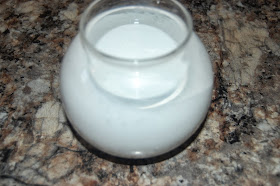
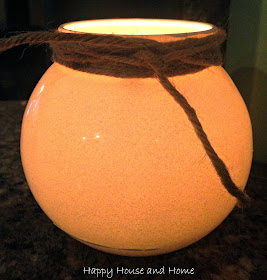
I love the look of milk glass so I thought I'd try making the faux version myself. Milk glass isn't too hard to find, but I wanted to swirl paint around inside of a glass, so I did!

I found this little vase in my dining room hutch. Score! I know, by the way I describe finding things, it sounds like I belong on Hoarders, Buried Alive. I've said this before - but I assure you, I don't have to climb a mountain of magazines and QVC boxes, to sleep on the corner of my living room chair.


faux milk glass, DIY milk glass, milk glass


Anyway, back to the plan. I found this little vase. I took about 1/8 cup acrylic plain white paint and mixed it with 1 TBSP water in an old Tupperware thingy. I didn't find measurements anywhere - I just guessed. I wanted the paint thick enough to stick to the glass, but runny enough to swirl ! The swirling is the key!

I poured it in the vase and swirled it around. SUPER fun! (No, I don't get out much).

faux milk glass, DIY milk glass, milk glass


I poured out the excess and let it drip on a large Ziploc bag, for about 1/2 hour.

faux milk glass, DIY milk glass, milk glass

After that, I wiped the rim with a damp cloth, and just did a little touch-up with a small paint brush.

faux milk glass, DIY milk glass, milk glass

I tied a little twine around the top, just to cover up the jar threads. 

faux milk glass, DIY milk glass, milk glass

I added a tea light, and it has such a pretty glow.

faux milk glass, DIY milk glass, milk glass

(You'll notice the large carafe that I'm drip drying on the baggie - uh, that one didn't work out so well. Mainly because my nosey cat knocked it over... let's not talk about that.)

Have you made faux milk glass? I'm definitely going to make some more. Next I'd like to try using the white paint on the inside of a colored vase. I've seen that done on other websites and it looks really pretty.

Whether you're a blogger or not, come and get some inspiration - I party HERE.

Saturday, February 8, 2014

DIY Silhouette Wall Art

Hi everyone! 

Today I'm sharing my DIY Silhouette Wall Art


DIY wall art, wall art crafts, silhouette crafts, canvas wall art

As you can see from the photo below, it's still a winter wonderland! 
No matter the season, I adore the view from my front porch. 


Here's the view, looking south and west. 
I just love all of our trees! 
(Big A doesn't - he has to mow around all of those tree trunks.)


As I looked at my view, 
I thought, I'm going to paint my trees.

Nailed it!
(Well, okay, I used a little artistic licence.) 

I started with a blank canvas and painted the edges black. (I also painted the side edge of the canvas). As you can see, I didn't do this very carefully. I knew it was going to be covered up. 


Next I mixed up 1/2 Elmer's glue and 1/2 water to make my own mod podge.

Shake, shake, shake. (Shake your groove thang). 

I "painted" the canvas with mod podge.

I found an old book, and lucky for me, the edges of the pages were yellowed. I like the look of the aged edges of the pages. 

I roughly tore the pages, and placed them randomly on still damp canvas. 


After I had all the book pages down, I "painted" them with mod podge too.
I started to smooth out the wrinkles,
and then I decided the wrinkles looked kinda cool. 

It took about 3 hours for the mod podge to dry completely, 
and then I free handed the trees with a sharpie. 


I know, I know, but in my defense - I have a degree in television production, not art!

To fill in the trees, I used black acrylic paint (which is about $1 per bottle at AC More).

DIY wall art, wall art crafts, silhouette crafts, canvas wall art

Once the canvas was (mostly) dry, I tried hanging it in various spots. 

DIY wall art, wall art crafts, silhouette crafts, canvas wall art

All in all, it's been in 7 different spots, and I'm still not quite sure where it will end up. 

DIY wall art, wall art crafts, silhouette crafts, canvas wall art

Either way, I'm happy with it.

It has a little bit of a spooky feel doncha think? I asked Big A if I should paint a raven on one of the branches and he replied: "No paint me in there, on the lawn mower". See, he has issues. 

For a list of parties I'll be at - go HERE

Friday, February 7, 2014

DIY White and Gold Painted Bowl

painted bowl, white and gold painted bowl, wooden serving dish diy


I had a natural wood serving dish that, at one point, I used for it's original purpose - 
to serve bread, crackers and cheese, or olives.

(source

I get bored. So, I painted it dark brown, and used it as a centerpiece with tea lights.


And then I added some pine cones.


Today I needed a little something to do, so I painted it white,


and gold, and added a flower. 

painted bowl, white and gold painted bowl, wooden serving dish diy

Now I'm going to use it to hold my jewelry at night. 


So tell me! Do you get bored and change things over and over again?