Pages

Wednesday, November 27, 2013

A Little Christmas Garland

Christmas garland, garland, DIY garland, ornaments
 
I KNOW! Most people wait until after Thanksgiving before they decorate for Christmas, but I just can't help myself!

Not only have we strung some lights on the front porch - we built an outdoor Christmas tree for our front yard (tutorial here), we put a small artificial tree in the kitchen, I made a couple of wreaths, AND I made a couple of easy garlands.

I won't bore you with all of the details, but I will show you my favorite garland. Cuz it's so easy and cute.

The garland I like the best is simple. I found a box of 36 x 2" gold ornaments at Big Lots for $4. I took a roll of twine and just threaded the ornaments on. Every 6 inches I knotted the twine just to keep the ornaments from moving around too much.

(If you want to make something similar, I had to put a dab of hot glue on the end of the twine,
and twist it, to keep it from fraying when I threaded it through. Yes, it burns a little, but who needs finger prints?)


Nearer Christmas (or at least after Thanksgiving) I may "bling up" this little garland a little, but for now I like the rustic look. 


And, now that Thanksgiving is only a day away, it's safe to say I'll be decorating quite a bit more this coming weekend. Especially since we're all going out to the woods to get a tree on Sunday, AND, more importantly, Big A bought some Egg Nog!
 
It's a rule that you decorate for Christmas if you have egg nog in the house, isn't it? That's what I thought.
 
What about you? Have you started decorating for Christmas yet? 

Sunday, November 24, 2013

Making an Outdoor Christmas Tree


build a tree, make a christmas tree, build a christmas tree
 
Our front yard of full of trees. It's beautiful, but at Christmas time, there's one glaring omission - not one pine tree to wrap in lights. Last year we decided to try and wrap a couple of the maple tree trunks with lights. It looked kinda cool. But we wanted a more traditional look.

(Planting a pine tree isn't an option because we like the look of the yard exactly as it is the rest of the year.) 

So we had the great idea to build a tree. (Reeeeaaal traditional, I know!) Oh, we were well aware that this could be a total waste of time, but we like to live on the edge.

Off to Home Depot.

We didn't have a list or a plan. We talked about ideas in the truck. That was our plan.

After walking around Home Depot aimlessly for a while, here's what we bought:

4 x 1/2" x 10' of conduit pipe (these are super fun to carry around in Home Depot - I didn't look back to see the carnage left behind..)
1 x Conduit T or Junction Connector
3 x 1/2" x 2" Re-rods
Zip Ties
A Twinkle Light Star
Twinkling Icicle Lights - we got the kind with random twinkling so it looks like they're shimmering. Here's a link if you're interested!

Celebrations Lighting V84B4112 Shimmering Icicle Light 100


Looks like a tree already, huh? Can you see it yet? Me either.

We needed the pipe bender. (We spent 45 minutes searching our basement for this thing! If you're looking for yours - look on the table in plain sight - that's were it will be.)


It was sunny, but frigid outside, so we were working fast! The whole project (not including searching for the pipe bender) took about an hour.

The first thing we did, was use the pipe bender to bend the conduit about 66 degrees, so that it would fit into the T and taper down to the ground.

 
Once the pipe was bent, we put it into the T and tightened the screws. This is what the top of the "tree" looked like:


It's about 8" across at the top, but don't worry, it's 10 feet tall so it looks pretty pointed once it's lit.
 
To keep the frame secure we used 3 re-rods which Big A sledge hammered into the dirt. This is where the blood came in. Poor Big A sledged hammered his finger! We then fit the conduit pipe onto the re-rods.
 
 
We wrapped the icicle lights around the tree frame at 6" intervals. We secured the lights with about a million zip ties. This took FOREVER. (Maybe it was only half an hour, but at this point our feet and fingers were frozen.) 
 
 
Once the lights were on, we put the star on top. This proved a little tricky. We drilled a hole in the top of the T and put a tine of the star in the hole, but it was too wobbly. Solution - silver duct tape the "you know what" out of it!

Done.

The actual frame cost about $20. (The lights, star and extension cords are worth about $100 extra).


It looks tiny in this photo, but it's actually 10 feet tall and 5 feet wide at the base. All in all we were pretty pleased with ourselves. We might have high-fived. In fact, we might build a couple of smaller trees to keep it company.


Friday, November 22, 2013

Fabric Garland

fabric strips, crafts, DIY garland, fabric strip garland


Big A and I have been working on a rather large project. In fact, it measures 10 feet tall. It's led to quite a few swear words, some maniacal laughter, and blood. Despite all of that, in the end, we won!

But I can't show you that yet. I need a couple of days grace period to get all the pictures up and, quite frankly, to have Big A to sit down and tell me the real names of the tools and parts we used. Otherwise, my post would give you a tool/parts list like this:

Bendy Thing
Nuts
Poles
Metal Slicer

See what I mean? We need him.

SO, until tomorrow, I am going to show you one little thing I've been working on. ("Working on" may be too strong of a phrase - perhaps I should say "puttering with".)

A few weeks ago, I made a fabric scrap valance (tutorial HERE) for our double doors to the back yard. I really loved the look of it:

 
But then I decided I didn't like the rigidity of the tension rod with the rustic look of the fabric. So I strung all of the fabric strips onto jute twine and re-hung it as a banner.


Much better! I prefer the garland. What do you think?

Tomorrow I'll be back to post about our larger adventure! Until then! Julia

Monday, November 18, 2013

HEAVEN is a Lobster Dinner

lobster, cooking lobster, how to cook lobster


With three kids at home we eat a lot of spaghetti and meatballs, tacos, meatloaf, and mac 'n cheese. That's fine most of the time, but Big A and I crave grown-up food, and we LOVE seafood. Our picky eaters don't allow us that freedom very often, however, once in a great while we grab some scallops, or fish, and occasionally, a couple of lobsters for ourselves. The kids don't complain as long as we get them a pizza.

Last night we happened to have a rare night at home with no kids. Is it pathetic that we sped to the grocery store to pick up a couple of lobsters? I guess you could say we're both a little tired of meatloaf.

I grew up going to Maine with my family in the summers, and I cook lobsters the way my parents taught me. Boil. Serve with hot butter and a squeeze of fresh lemon. There's something about the flavor of lobster with the butter, and getting all messy. It's just fun, and it tastes like heaven.

But before we get to cooking, you have to pick out your lobsters.

When I buy live lobsters, I want them to be right around 1 1/2 lbs. These are the perfect size in my humble opinion. Also, if you're buying them, be sure the lobster is lively. You don't want a lobster who's not moving around - that means he's not doing too well.

(B T Dubs, you need to buy your lobsters the day you are going to cook them.)

When I get them home, I keep them right in the bag, and just pop them in the fridge. The cold of the fridge will make them a little sedated, so they shouldn't run around too much.

When ready to cook, fill a large stock pot with water. If you live by the coast, you can use fresh sea water.  I don't, so I add salt to the water - a lot of it. I used about 1/2 cup salt to my large stock pot. Place over high heat and bring to a rolling boil.

When the water was almost boiling, I got the lobsters out of their bag. Our cat was so curious about the lobster - so Big A put him down for the cat to see. Too gross?


Once done playing, we got down to business.  (Big A thinks this next picture is morbid. And he's kinda right.)


Plunge the lobsters head first into the water and put the lid on. Be careful not to get splashed with the hot water. Once they're in the water, reduce the heat so that the water wont boil over, but so that it's still boiling. If it boils over, it gets very messy - trust me, I do it every time!

(A Note - Big A will not put the lobsters in the pot. I get it. It seems kind of mean, but, I will do anything for food. Still if your squeamish - lobsters truly don't scream. Any noise is just a little air escaping from under their shells. Apparently they don't feel pain - they do not have complex brains, just nerve bundles.)

For 1 1/2 lb lobster I boil them for 20 minutes. NOTE - most cooking charts advise a lot shorter cooking time, but I find 20 minutes is perfect. Mine were not tough or rubbery. 


Once the time is up, your lobsters will be bright red. Use tongs to pull the lobsters out and place them in a colander in the sink. Let them drain and cool for about 10 minutes.

While the lobsters cool, melt about half a stick of butter for two people. Add the juice of a quarter of a fresh lemon to the melted butter. (To your taste).

I serve the lobster on a plate with a little side dish of butter for each person. I personally only eat the claws, knuckles and tail. I don't bother with the little legs. There is some meat in them, but it takes the patience of a saint to get it out.

If you want to see how to get the lobster meat out of the shell, check out this quick video:


Easy huh? 

What to serve with lobster? Uh, we just had butter with lemon. I don't like any other food to distract me from the taste of the lobster. However, it wouldn't be wrong to have salt potatoes and a simple side salad. (It also wouldn't be wrong to have blueberry pie with whipped cream after your lobster.)

I'm dying to know - do you like lobster? If you had a night alone, and didn't have to make kid-friendly food, what would you run out to the store for?

Saturday, November 16, 2013

Do You Feel Lucky, Punk?

horseshoe, horseshoe craft, hang a horseshoe

Are you lucky? I'm totally lucky.

Yes, I'm lucky to have an awesome family and great kids (truly). But, here's a little secret, I'm also lucky, as in lotto winner lucky.

I'm gonna get luckier, because I made this cool horseshoe, which I will get to in a minute, but first, let me tell you the lottery story.

A few months ago, the New York lottery was around 150 million dollars. I woke up the day of the lottery just feeling lucky. Really, I did. So I told Big A, and he said, "Well you'd better go and buy a lottery ticket then". So I did. This was my first time buying a lottery ticket, so I was excited.

I raced out to the gas station where they sell the tickets, and then raced home, ticket in hand. I ran through the back door and thrust the ticket at Big A - because he knows how to do these things. He proceeded to sit down at the kitchen table and put his glasses on (that means it's an important moment), to scratch off the ticket and check out those numbers.

I have to admit, I was a little nervous, even though I was fairly confident I would be a winner. You worry about all of the media attention, or if the wealth will affect your children... Anyway, after several minutes....

Big A looked up at me with a funny little grin. I KNEW IT!!! Guess who won the lottery! This girl!

Eight dollars. It's your birthday. Eight dollars. It's your birthday.

As I chanted and danced, Big A shook his head and walked out of the kitchen.

I yelled after him, "Hey, that's either dollars more than I had! First time playing the lottery and it's a winner!" I think he mumbled something about me spending two dollars on the ticket, but whatever.

It makes me happy to look for lucky things.

For instance, the other day I was reading Readers Digest at the dentists office. (It was a lucky day, because usually I end up with Popular Mechanics or Sports Illustrated).  Anyway, I was reading this incredible story about a lady named Ann Hodges. Compared to Ann Hodges we're all super lucky. She was snuggled up on her sofa when a grapefruit-size meteorite fell through the roof of her house, bounced off her radio, and hit her! She's the first, and maybe only, person to be hit by a meteorite. She lived, but geesh. THAT makes me feel lucky.

Ok, time to stop fooling around and show you my horseshoe.

This summer I found a horseshoe in our stone wall. That wall has been on our property for who knows how long, and we don't have a horse, so that old horseshoe could be super old. I found it and thought that was pretty lucky!

I wanted to hang it up somewhere, but first, I put it in the basement to collect luck for a while. Finally, when it was all luckified, and I had an idea of where I wanted to hang it, I gave it a quick spray of gold glitter spray paint.

Then I wrapped it with twine to make a little hanger for it, and because I like twine. I used a hot glue gun to secure the twine, because it wouldn't be very lucky if a horseshoe fell off the wall and on anyone's head.

 
Feeling a little nervous, at the irony of a good luck charm falling on my head, I added a good thick line of glue to the back for good measure.


I like the twine and the glitter with the rusted metal. It looks cool. And lucky.


I hung it up by our back door, and made a little bow of twine to hide the hook.

 
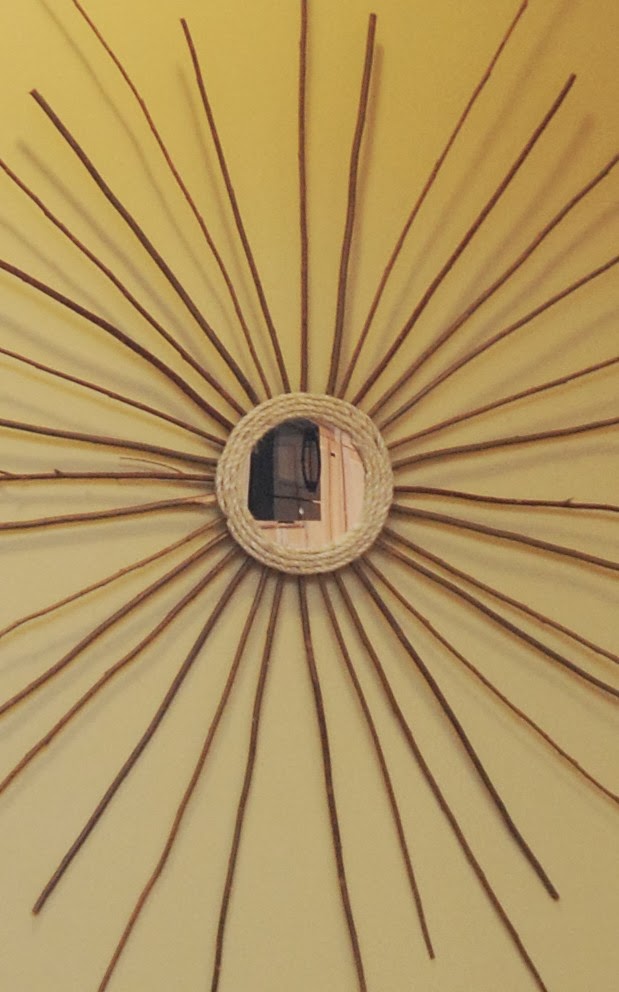
Here is the panned out view (with the paint looking true to color - our kitchen is yellow, not taupe. I don't know why the above photo came out that color. Anyway....)


I love it. I hope it brings more luck. I really hope it doesn't fall on my head.

What about you? Are you lucky?

(Party here!)

Wednesday, November 13, 2013

Being Grateful


being grateful, giving thanks, thanksgiving


With winter setting in, and Thanksgiving approaching, I'm getting excited for the holidays. Lots of people are sharing what they're grateful for, so I wanted to share a story with you all. It's about my Mom and Dad.

My parents are the best - and I love them very, very much. I'm especially grateful to them because they make me laugh every single day. It's not as if they tell jokes. No. They just Do And Say Funny Things. Today is no different.

Here is the Story

My Dad retired this year. Mom retired several years ago, and has had the house to herself five days a week. Now they're both retired and at home. Together. All the time.

My sister and I were a little worried about how they would get along being together all day, every day. You know, people get used to their schedule and their own space. And then suddenly, like so many couples after retirement, they're thrown back together, 24/7.

It's got to be an adjustment.

Not to mention, my Mom and Dad are somewhat different from one another. Dad likes to watch Cops, Mom likes to watch Millionaire. Dad likes to cut down trees, Mom likes to plant trees. Dad likes to buy tools, Mom likes to buy shoes. These seem like inconsequential differences, but think of the potential for conflict!

Yes, we were a little worried.

Yet it appears we were worried about nothing. My Mom and Dad seem to be having fun. They're having an addition built. They go shopping. They go out to lunch. That's what they tell us anyway.

Seems all is going well.

Yesterday, secure in this fact, I felt the urge to chat about Thanksgiving, so I called my Mom. It was late afternoon, and I pictured my Dad in his big chair by the fire, and Mom making him dinner while we chatted.

We hit all the side dishes - my sister is bringing a pear and sweet potato bake, I'll make the green bean casserole. We talked about relatives - and who may or may not be coming. We talked turkey - the size of the bird, and method of cooking.

We were mid-turkey-talk, and just about to talk PIE.

Abruptly my Mom stopped and said (seriously and with some urgency):

"Honey, I'll call you right back. I just remembered, I have to let Dad out of the basement."

And she hung up.

And I laughed, and immediately called my sister.

What's making you laugh today?

Friday, November 8, 2013

Painting the Dining Room Table (and other battles)

Only a couple weeks until Thanksgiving, but I'm craving turkey now. Big A and I had to go grocery shopping anyway, so I thought I'd get my wish. Guess what I ended up with? Ham. I'm not fond of ham, although Big A is. He won.

And I didn't argue because, after all, we are going to have turkey in a couple of weeks. And because, sometimes, you have to Pick. Your. Battles.

And This is My Battle...

That very same day, the following text conversation actually took place, and is word for word:

Me: I want to paint the dining room table!

Big A: No.

Me: Can I paint just a stripe down the middle?

Big A: No.

Me: Envision it!

Big A: No.

Me: But it would look cool.

Big A: Buy a table cloth.

Me: C'mon. Please!

Big A: No.

Me: You're mean.

Big A: I know honey.

And then he changed the subject. And I, master commander and battle planner, silently prepared for battle.

You see, I don't mind not winning in the turkey department. But the table? He hasn't heard the last of that one. Now that I have it in my head, I've become consumed by the idea. In fact it has become my battle.

Our table:


My Battle Plan...

Shock him with the brilliance of painting the table using blogger ideas and pinterest.
 
Yup, that's my plan.
 
Oh, I know, I'm just like Julius Caesar.
 
Here's the situation. We have a large, oblong, oak dining room table (see above). It's sturdy, and reliable. But boring. If you couldn't already tell, I want to paint it. I like "sturdy and reliable", but I'd like it to have a little more personality. I want people to walk in and say "WOW look at that table!"
 
So without further ado, let the ambush begin!

Here are my favorite ideas for the dining room table reformation. 


I found and example of a distressed black table. Our house is open plan, so it would fit right in. I would be willing to paint just the top of the table, and leave the chairs and legs oak. I think that would look amazing. See more details and ideas like this table HERE.

Our original plank top Farmhouse dining table finished in Midnight over Sicily with Summer distressing.

I also think a stripe down the length, or maybe just the width, of the table would look impressive. Check THIS striped table - from boring to amazing! Although the colors are too light for my taste, I love the IDEA of a stripe down the length. Or two stripes, width-wise at each end of the table.

chalk paint dining set


The following table was stenciled by Nicole at These Days. I could see stenciling ours, but with a bolder, black and more rustic looking stencil.


For example, the stencil on barn wood below would be something I'd like. I like the simple design of the stencil. See Lemon Tree Creations!
 IMG_5009.JPG
 
So that's the first stage of my battle plan. (Not only is it the first stage, it's the only stage...). I'll keep you posted on my progress.
 
It may take some time, but I can be patient - after all, Rome wasn't built in a day.
 
Link here: Link It Or Lump It
 

Wednesday, November 6, 2013

Buyer’s Guide to Pendant Lights

pendant lights, lighting, buying pendant lights
Pendant lights are among the most versatile lighting types and because of this, they are also the most popular choice taken by several homeowners. If you don’t know yet, pendant lights are suspended lights – meaning they hang from a base through a chain, rod, or wire. They may be somehow similar but are not the same with ceiling lights, which are hung closer if not on to the ceiling.
There are many different types of pendant lights which could make the selection process more difficult than it actually should be. In the following paragraphs will be the different variations of pendant lights and a brief description of each:
Multi Light Pendants
Ideal for working areas such as the home study, kitchen, and dining area, multi light pendants don’t merely provide illumination for productivity but can as well add aesthetic value to any piece of space. They are eye-catching and are great for rooms with only a single overhead electrical opening. Multi light pendants are designed to have a central fixture, from which hanging lights branch out into different directions.
Mini Pendants
The tiniest type of pendants, mini pendants are perfect for areas where extra task lighting is needed. Kitchen island and office desks are just some examples of home areas where mini pendants are commonly installed.
Down Light Pendants
This type of pendant lights directs light in a downward direction, making it a great option for direct illumination on work spaces or high traffic areas. These suspended modern fixtures are great for drawing boards or cooking areas where higher levels of illumination are needed for productivity.
Drum Pendants
Quite true to their name, drum pendants take the form of drums. They are highly versatile as they can look good in any area of home and come in great variations in terms of style and shade. If you like to keep it simple, there are also shades in plain white with metal accents. Those who prefer patterns and unconventional designs, on the other hand, can choose from different patterns and double or triple concentric shades.
Up Light Pendants
Unlike down light pendants that direct light towards the floor, up light pendants give off light in the direction of the ceiling – making small spaces appear wider. If you have a tiny room to light up and would like to eliminate the cramped feel to it, up light pendants should be your best bet.
Bowl Pendants
This type of pendant lights are the closest you can get to chandeliers. Bowl pendants are usually connected to the main suspension with 3-4 chains, or held in place by a rod or stem. They are generally ideal for ambient lighting because they provide adequate up and down illumination.
Lantern Pendants
These are the pendant lights that are typically hung in wide lobbies, foyers, or at the main entrance of the house. Their form comes in a cage-like shade, covered with glass, and is connected to the center by a chain. Because of their tendency to diffuse very bright light, lantern pendants should be installed with dimmer switches.

Oscar Riley just loves keeping the house together and seeing to it that it's also kept as gorgeously as possible. Apart from that, he also likes to write and share his knowledge on home improvement and design to many netizens. He highly recommends Interior-Deluxe for high-quality light fixtures for home and commercial use.

A Winter Wreath

Where the heck did autumn go?

wreath, DIY wreath, wreath making

It's cold. Can't feel your fingers cold. And guess what. I still have a summer wreath on my back door. Yeah. While I was watching the snow in the air this morning, it dawned on me - perhaps it's time to retire the sunflower wreath.

But, since it's so cold - the kind of day you just want to curl up on the sofa, with a cup of coffee, and watch Long Island Medium re-runs (maybe that's just me?). I decided to at least take that summery wreath down. But once I took it down, I realized I wanted to get into the spirit of things. Sometimes that just happens. Just when I was getting my lazy on.

Ergo, the little man and I were on a mission. (Sometimes you've got to use a word like ergo, don't you think?) Okay, maybe this was my mission, but my guy's always game for heading outside. Especially for a pine cone gathering mission. Armed with our Wegman's bags, gloves and hats, we clomped out to the woods in our boots.

Half an hour later we had a bag full of pine cones (and dirt). Score!

As mentioned, the pine cones were dirty, and wet, from lying on the ground in the woods for centuries. So I put them on top of the heat registers around the house. Big A loves when I do this - when you step on them, it's almost exactly the same as stepping on a lego. After a few hours the heat dries out the pine cones, and makes them all nice and fluffy. If a pine cone can be fluffy.  (I know there are ways to dry pine cones and de-bugify them, but is all I did was stick them on the registers. I live on the edge.)

Once they were all dried, it was time for my evil plan...

I used a grapevine wreath, which I love on their own, so I decided to cover only part of the wreath. I wrapped a strip of burlap around the bottom 1/3 of the wreath, and glued the pine cones onto the burlap. Honestly, I didn't have a plan. Not even an evil one. I just glued them on with gay abandon. 

I glued some burlap bubbles, and bunches of burlap, just to fill in the spaces.


I tied a bunch of the tiny pine cones using some jute twine, and hung them down in the middle of the wreath.

Finally, to give the pine cones a little color, I brushed them with gold glitter paint. (Of course!)

And, voila! We're ready for the snow! Ok, maybe that's an exaggeration.

Monday, November 4, 2013

Thai Peanut Noodles

thai noodles, peanut noodles, noodle recipe


These noodles taste like a combo of Singapore Rice Noodles from our local Chinese Take-Out, and Thai Peanut Noodles. You could eat these as a meal all by themselves, or you could serve them with any Chinese or Thai style meat/main dish. I served them with Crispy Sesame Beef (recipe link below). It was all delicious!

I served the noodles warm, but they are good cold too. (I know because I had them leftover the next day for lunch, cold! Oh alright, I feel my snout is growing longer, I had them for breakfast.)

Keep in mind that this meal is not going to be listed on any Weight Watchers Menu, but it's got to be better for you than actual take out. And, despite the dietary failings, it tastes amazing!

Thai Peanut Noodles
serves 6-8

Noodles:
12 ounces angel hair
1 cup finely sliced carrot
1 cup frozen French green beans
4 tablespoons sesame oil

Cook pasta with the beans and carrot, according to angel hair package directions (about 4 minutes). Drain, and toss with sesame oil.

Sauce:

1/3 cup crunchy peanut butter
1/4 cup hot water
2 small cloves minced, fresh garlic
1/2 tablespoon ground ginger
1 tsp turmeric
1/4 cup honey
1/4 cup soy sauce
3 tablespoons rice vinegar
1/2 tablespoon chili-garlic sauce
1 tsp chili flakes (or fresh chili to taste)

For Garnish:

1/2 cup green onion, chopped
1 tablespoon sesame seeds

Mix the hot water and peanut butter together in a bowl, then add all of the remaining sauce ingredients to the bowl, while the pasta and vegetables are cooking. Mix the angel hair, veggies, and sauce ingredients well. Add garnish if you wish. Keep warm.

*I threw these noodles together to go with Crispy Sesame Beef. The beef came out crispy and tender at the same time. I cooked the meat in batches, moving the cooked meat to a paper towel. Just be careful not to overcrowd the pan!

(The link is for chicken, but I used sirloin beef, cut into thin strips. I did not deep fry - I used about 1/4 inch of oil in the bottom of a large frying pan. Also, note that this recipe calls for drizzling the meat with the marinade. I didn't like the idea of that, so, once the meat was all cooked and removed to paper towels, I then removed most of the oil from the pan. I de-glazed the pan with the marinade and added the meat back to heat through.)

**Ummm - embarrassing admission - we ate the meal before I took any pictures. The photo of the noodles is a picture of the leftovers! Unfortunately, we didn't have any leftover Sesame Beef for me to photograph. In my defense, I didn't think the meal would be blog-worthy until we ate it all!

Time for me to go powder my snout. :)

Friday, November 1, 2013

Giant Sunburst Mirror for a Large Space


Last Spring I made Giant Wall Art using sticks. Click HERE to read that!
Honestly, that worked well, until Big A walked by it last week and if came tumbling down off the wall and needed to be replaced. It's not the first time, we all bump it. So, I came up with:
 
Plan B.
 
Bear with me, with this tutorial - there's a moral to this story.
 
I took off all of those sticks (the ones that weren't broken) and decided to re-do this as a sunburst, only using a mirror). I also made sure to secure the sticks, very well. And here's the finished product:

 
Another sunburst mirror, using a dollar store mirror, rope, and sticks.
(*For me, of course, this is my second round of this project).
 
First, I bought a mirror from the dollar store. The kind I bought has the little suction cups on the back. At first I tried to pry them off, but then I realized that I could use picture hanging wire to wrap around two of them, for hanging the finished sunburst mirror.
 
The mirror I bought was green, so I painted it black - but as it turns out I didn't need to. I was worried the color might show through the rope, but it doesn't in the end.
 
Take the glue gun and wrap the jute rope around the outside of the mirror. You can see the rope here:
 
 
Next you have to gather your sticks (or in my case, pry them off of the original, broken project). You can buy a bundle of sticks (the craft section of Walmart has them), or just gather them around your yard. Trim them and cut them to the length you want. You can see some of my sticks are curved and have some bumps, but they should be fairly straight. I used needle nose pliers and cut them to two different lengths.  Most people would use pruners, but I couldn't find mine!
 
Turn the dollar store mirror over, and use a glue gun to glue the sticks to the back side of the mirror. (Notice I am working on the very clean surface of my kids homework!)


Once the glue is good and dry, go over it again, to make sure the sticks are VERY secure before you pick the sunburst mirror up and try to hang it. 
 
 
Above is a picture of the wall as seen from our kitchen archway into the hallway.
The sunburst measured about 5' by 5'.
(Notice my subtle use of the past tense?)


I was very happy with it - especially for that large space.
 
THEN.
CAME.
BIG A.
 
Again.
 
Big A looked at me nervously and then laughed. And I laughed too. (Not a hearty belly laugh - more of a maniacal cackle.) And then I solemnly took my smashed to smithereens sunburst mirror and threw it in the trash. I felt better after my temper tantrum sulk, I then I really did laugh. And I realized that not all of my projects are going to work.
 
The moral of this story?
 
DO NOT hang giant sunburst mirrors in a high-traffic hallway. Seriously. I LOVE this project, and it looked impressive. However, if you make one, it needs a secluded spot where people aren't walking by all the time. It's light and easy to knock. The sticks are, well, sticky. They almost grab onto your clothing - and it doesn't end well.
 
It's a fail. At least for that hallway. Time to come up with Plan C.